Day 02: The Data Plane Gap (IAM vs. Linux Permissions)
Cloud IAM stops intruders at the door, but Linux permissions protect the room. A tutorial on mounting disks, using ACLs, and blocking malware execution.
Pratik Shetti
•Jan 22, 2026•4 min read
👋 The Goal
We often assume that securing Google Cloud IAM (Identity Access Management) is enough. But what happens if an attacker gets inside the VM?
Today, we explore the Data Plane Gap. We will prove that a secure Cloud configuration can still be vulnerable if the OS-level permissions are weak.
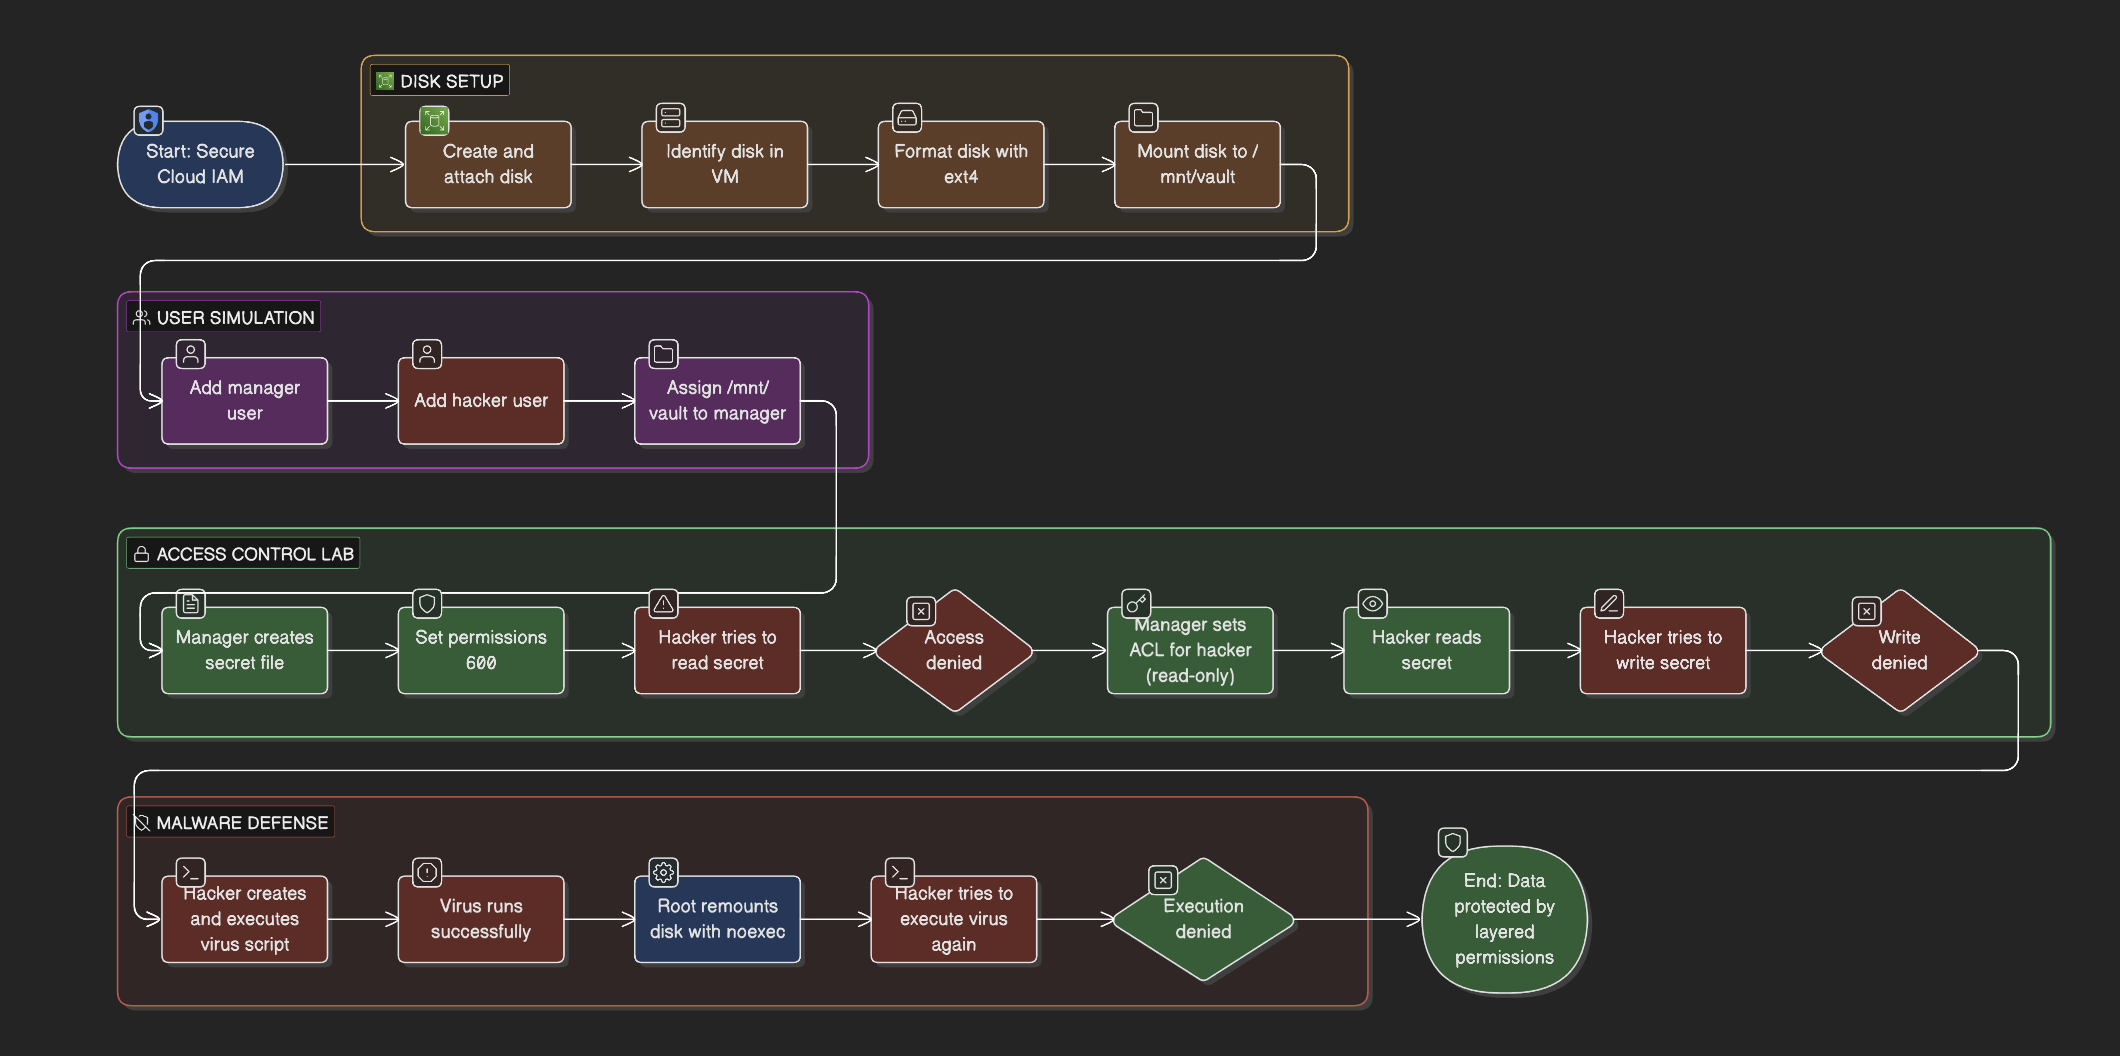
The Mission:
Manually format and mount a raw disk (The Plumbing).
Use ACLs (Access Control Lists) to grant surgical access without using chmod 777.
Use Mount Options (noexec) to prevent malware from running on data disks.
Prerequisites: A GCP Project and a standard Linux VM.
🏗️ Phase 1: The Plumbing (Disk Setup)
Linux does not automatically show new disks like Windows (D: drive). We have to build the connection ourselves.
1. Create & Attach the Resource
Console: Go to Compute Engine > Disks. Create a 10GB disk named vault-disk.
Attach: Edit your VM (manual-server-day2) and attach this existing disk.
2. Identify the Hardware
SSH into your VM. We need to find the device name the Kernel assigned to our new disk.
lsblk
Look for a 10G device (likely /dev/sdb).
Format the Disk (Clean the Slate) A raw disk is like a blank sheet of paper without lines. We must create a filesystem (ext4) to write data.
Mount the Disk (The Hook) We create a folder (/mnt/vault) and link the physical disk to it.
sudo mkdir -p /mnt/vault
sudo mount -o discard,defaults /dev/sdb /mnt/vault
Verify with df -h /mnt/vault. You should see 10GB available.
🎭 Phase 2: The Users (Simulation)
We need actors to simulate an "Insider Threat" scenario.
Create the Victim (Manager):
sudo adduser manager
Create the Threat (Hacker):
sudo adduser hacker
Assign Ownership: Give the vault folder to the Manager.
sudo chown manager:manager /mnt/vault
🔐 Phase 3: The Access Control Lab
The Challenge: We want to share a secret file with the Hacker, but strictly Read Only. We do NOT want to change the file owner, and we absolutely do NOT want to use chmod 777 (which opens it to everyone).
Create the Secret (As Manager)
su - manager
echo "Top Secret Codes" > /mnt/vault/secret.txt
chmod 600 /mnt/vault/secret.txt
# 600 = Only I can read/write. No one else.
The Failure (As Hacker)
su - hacker
cat /mnt/vault/secret.txt
# Result: Permission Denied (Working as expected!)
The Fix: Access Control Lists (ACLs) Standard permissions are too blunt. We use setfacl to add a specific rule for one user. Switch back to Manager first.
 Pratik Shetti