Day 06: Private DNS & The Split-Horizon
Machines talk to IPs, humans talk to names. We build a Private DNS Zone to decouple Identity from Location.
 Pratik Shetti
[!NOTE] Some diagrams and videos in this post are AI-generated to enhance understanding and provide visual context. While they effectively illustrate the concepts, please refer to the command-line instructions for implementation accuracy.
🎯 The Objective
In the physical world, "Identity" (Who you are) and "Location" (Where you are) are different. In the cloud:
- Identity = Hostname (
db.internal.corp) - Location = IP Address (
10.128.0.5)
If you hardcode IPs in your application, you break this separation. Today, we are going to build a Private DNS Zone. This creates a "Split Reality" where your internal servers can find each other using friendly names that the public internet doesn't know exist.
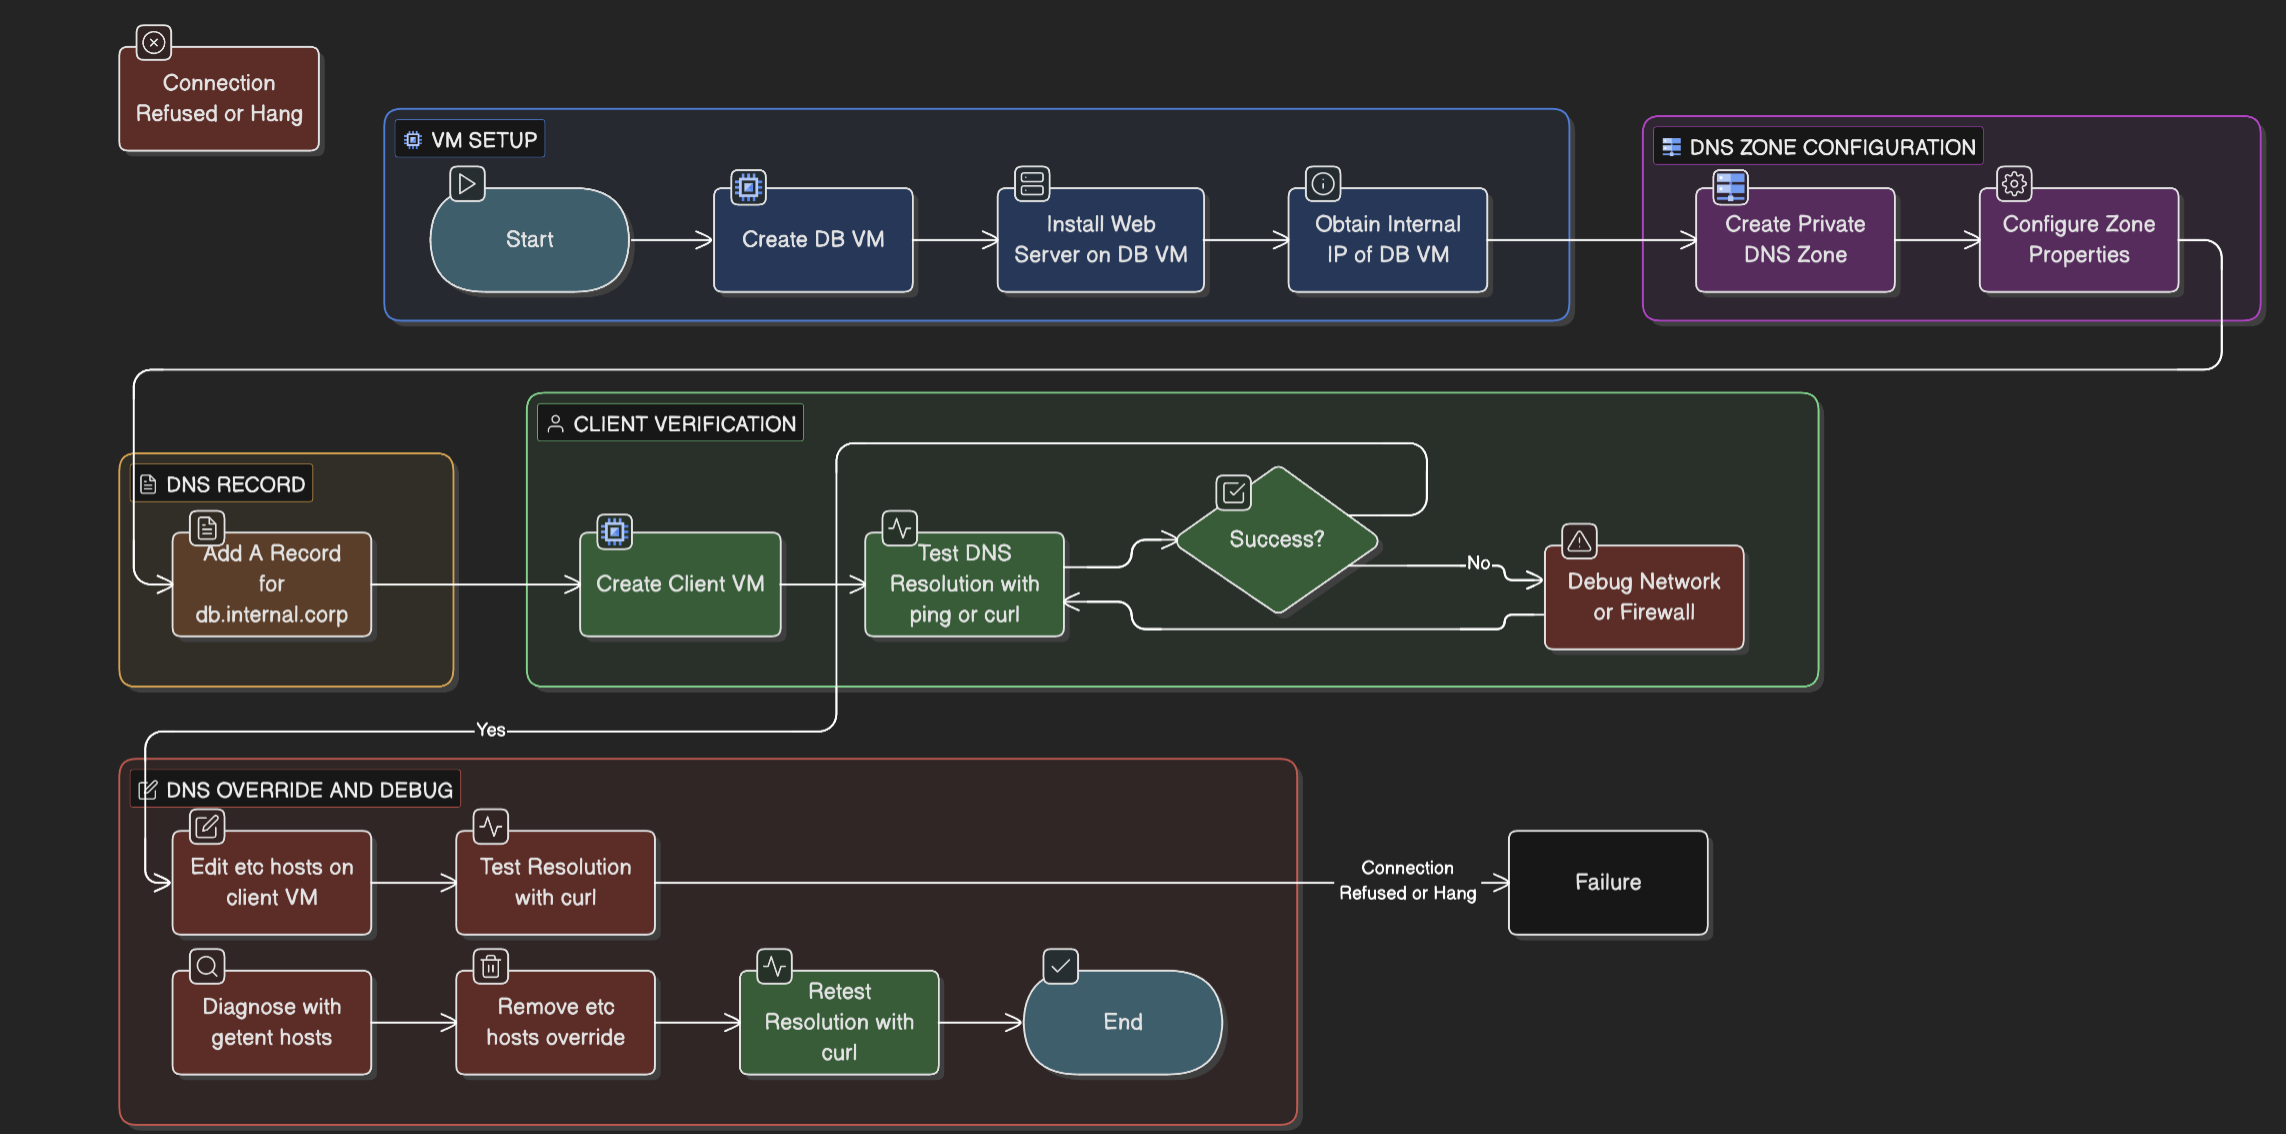
🏗️ Phase 1: The Infrastructure
We need a "Database" (Target) and a "Client" (Tester).
1. Create the Target VM (db-vm)
- Name:
db-vm - Region:
us-central1 - Network: Default
- Startup Script: Let's install a tiny web server so we can test it.
#! /bin/bash echo "<h1>I am the Database</h1>" > index.html python3 -m http.server 80 - Note the Internal IP: (e.g.,
10.128.0.5).
2. Create the Client VM (client-vm)
- Name:
client-vm - Region:
us-central1(Same as DB). - Purpose: This will be our testing machine.
📒 Phase 2: The Private Zone (The Phonebook)
Now we create the "Private Reality."
1. Create the Zone
- Go to Network Services > Cloud DNS.
- Click Create Zone.
- Zone Type: Private (Crucial!).
- Zone Name:
internal-corp-zone - DNS Name:
internal.corp - Networks: Select
default.
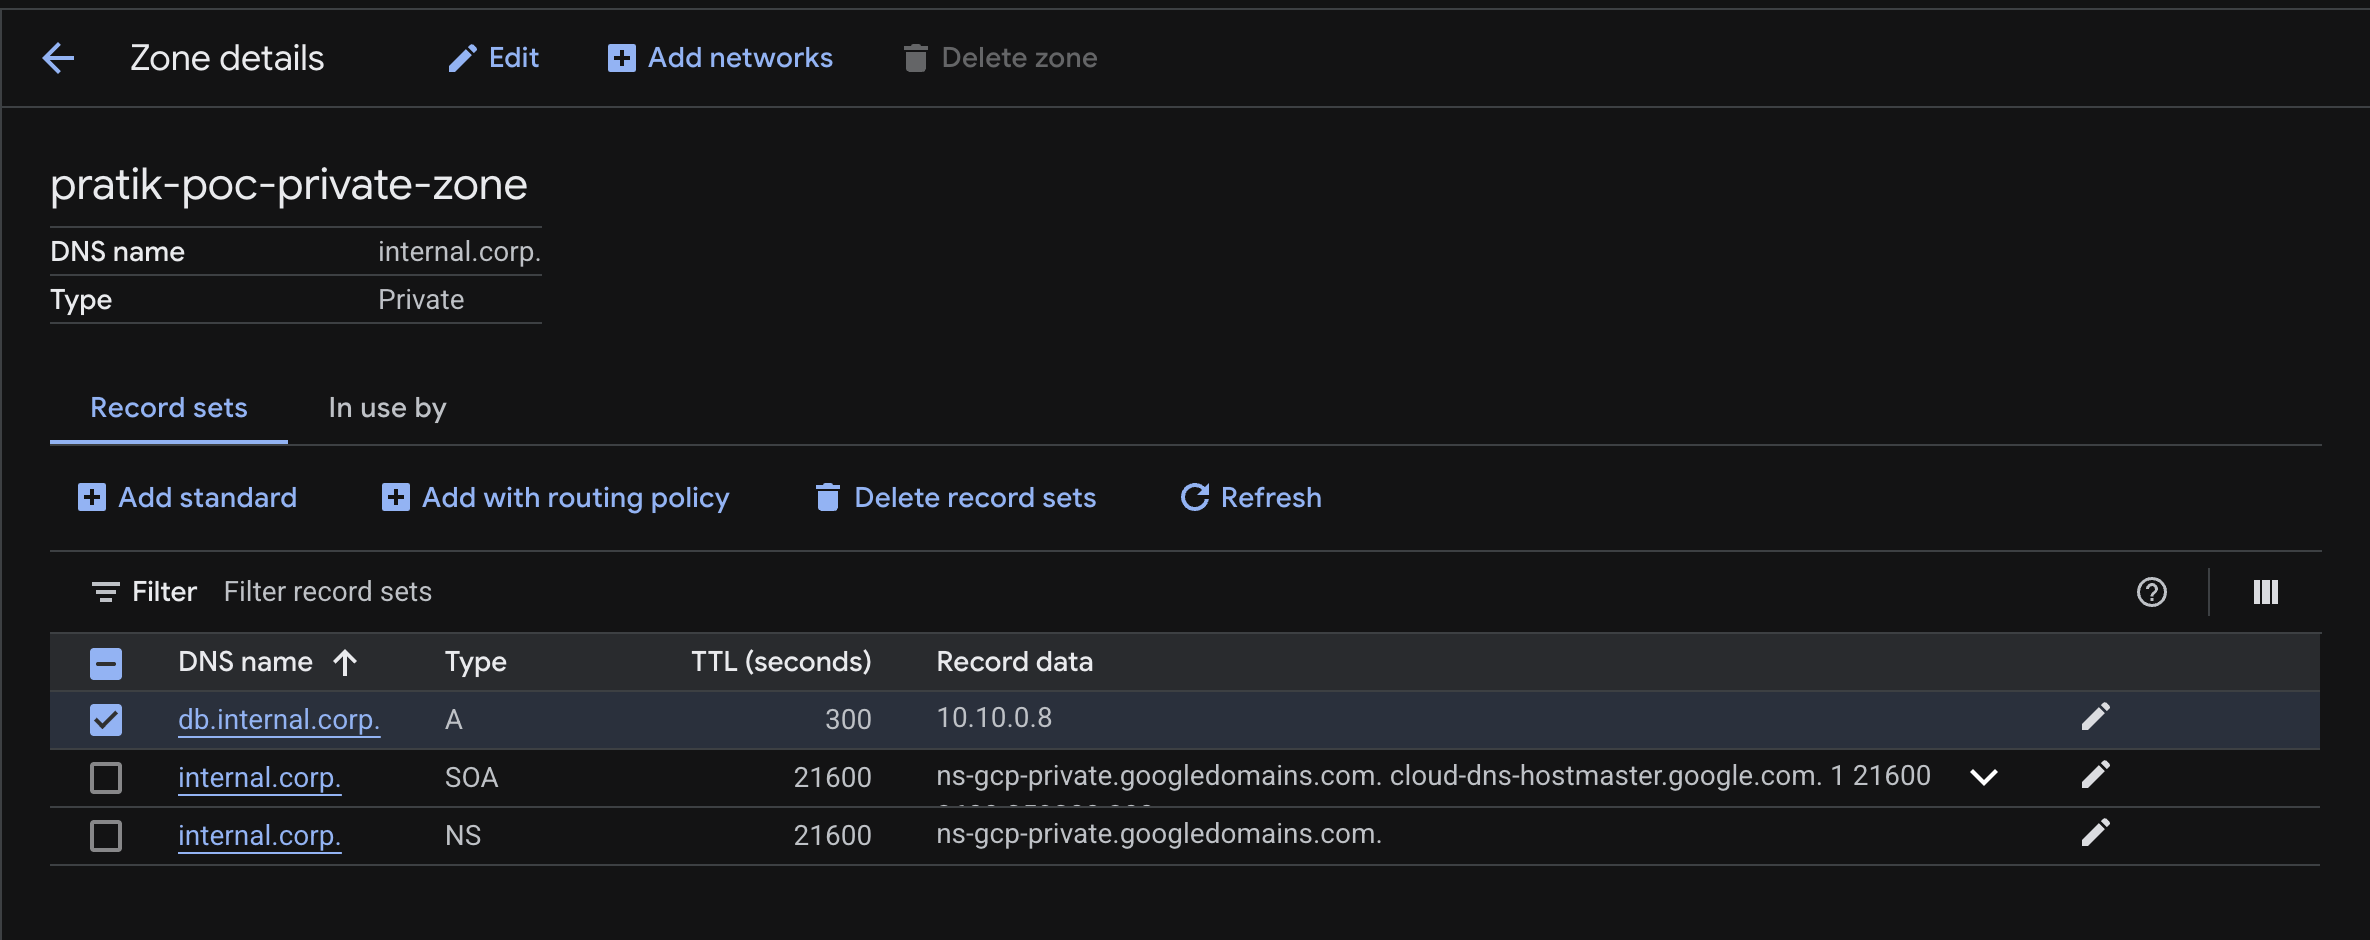
2. Add the Record
- Click Add Standard Record Set.
- DNS Name:
db(Full name:db.internal.corp). - Type:
A - IPv4 Address: Enter the internal IP of
db-vm(from Phase 1).
✅ Phase 3: Verification
Now, let's prove that names are better than numbers.
1. SSH into client-vm
2. Test Resolution:
# Ask the OS: "Who is db.internal.corp?"
ping -c 2 db.internal.corp
You should see it resolving to 10.x.x.x.
3. Test Connection:
curl db.internal.corp
Output: <h1>I am the Database</h1>
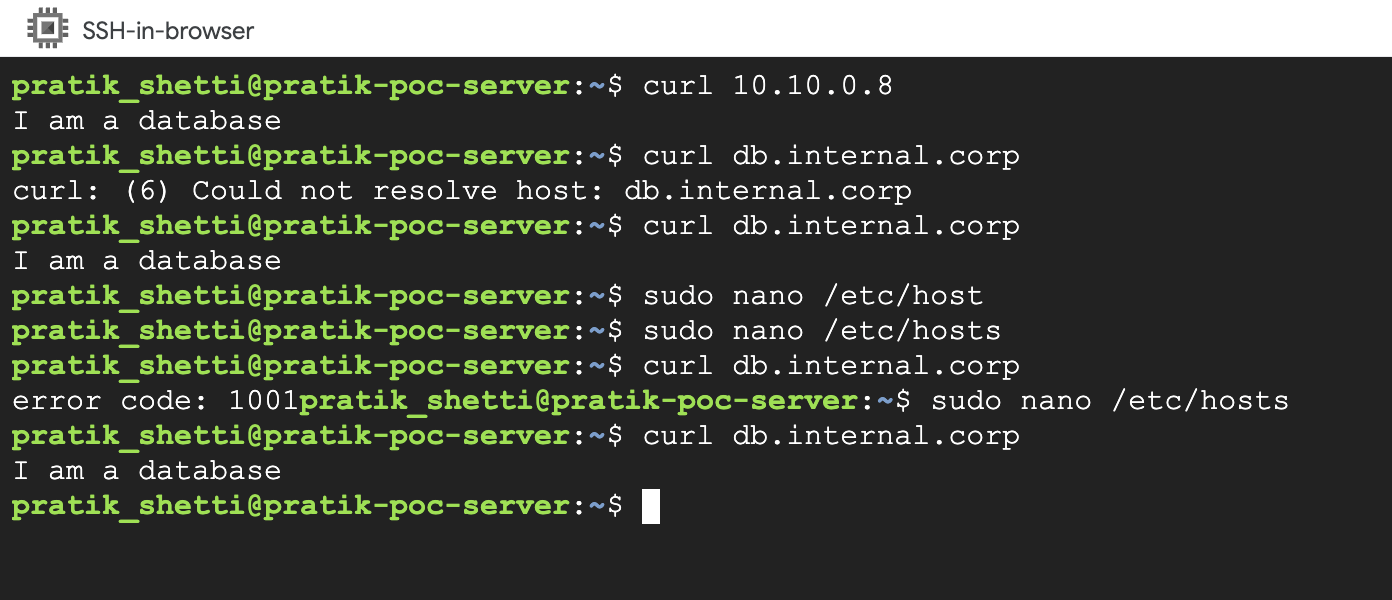
🕵️ Phase 4: The Sabotage (Troubleshooting)
Let's learn why "It's always DNS." We will manually lie to the OS using the /etc/hosts file.
1. The Lie:
Open the hosts file on client-vm:
sudo nano /etc/hosts
Add this line at the bottom:
1.1.1.1 db.internal.corp
Save and Exit (Ctrl+O, Enter, Ctrl+X).
2. The Failure: Try to curl again:
curl db.internal.corp
Result: It hangs or fails.
Why? Linux checks the "Sticky Note" (/etc/hosts) before checking the official Phonebook (Cloud DNS).
3. The Fix:
Remove the line from /etc/hosts. The connection will work immediately.
📺 NotebookLM Video Overview
Watch the AI-generated summary of today's lab concepts.
🧠 Key Takeaways
- Split-Horizon: You can have a private "internet" inside your VPC that the outside world cannot see.
- Order of Operations: Linux checks
/etc/hosts→ DNS Cache → DNS Server. - Decoupling: DNS allows you to move a server (change IP) without breaking the application (hostname stays the same).